Hobbies and Sport, Sport and Fitness

How to Stabilise The Wrist When Swimming

Swimming is a great, low-impact form of exercise that gives a full-body workout. I knew that if I could stabilise my wrist enough, swimming would help me to build up strength in my arm that is still weakened after a fracture and nerve damage from a road accident. I tried several ways to stabilise the wrist, and found some great solutions.

Disclaimer: This blog post is based on my experiences. I am not a medical professional so always check with your doctor before trying new things that could aggravate your medical condition.

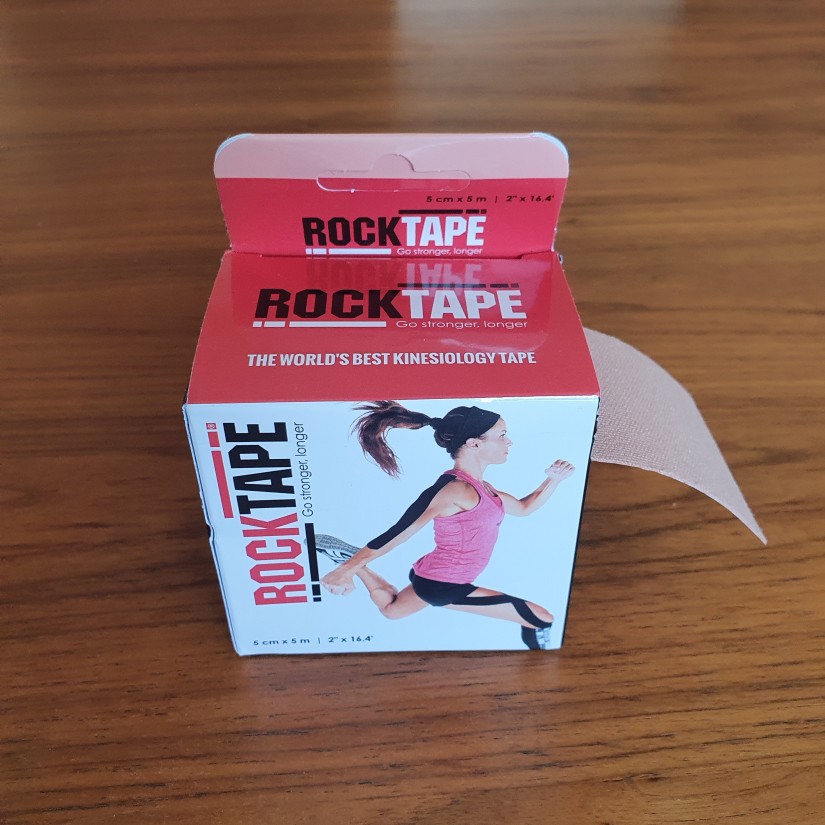
Support Tape (Lightweight Support)

Physio tape/ kinesiology tape/ sports tape is adhesive and slightly stretchy. It can be applied in different ways to best support muscles or joints during exercise. A waterproof tape should last for at least one swim session. Because this tape is designed to provide support without restricting movement, it’s on the lightweight side. Personally, several layers of tape wrapped around my wrist and crossing my palm were not enough to prevent my wrist subluxing when swimming.

If you have sensitive skin, tape might not be suitable for you.

Box of Rock Tape kinesiology tape. Photo of a woman on the box with tape applied to her upper arm and upper leg
Kinesiology tape

Neoprene Splint (Medium-High Support)

Neoprene splints are a comfortable support that can easily be removed and reused. Neoprene is slightly buoyant in water, and heavier when saturated when lifted out of water. For this reason, wearing a splint on just one wrist gives a slightly lopsided feel, especially when swimming frontcrawl, butterfly or backstroke. It feels less odd in breaststroke and is otherwise quite easy to adjust to.

Neoprene wrist splint secured across the back of the hand and wrist by velcro straps
Side view of neoprene wrist splint

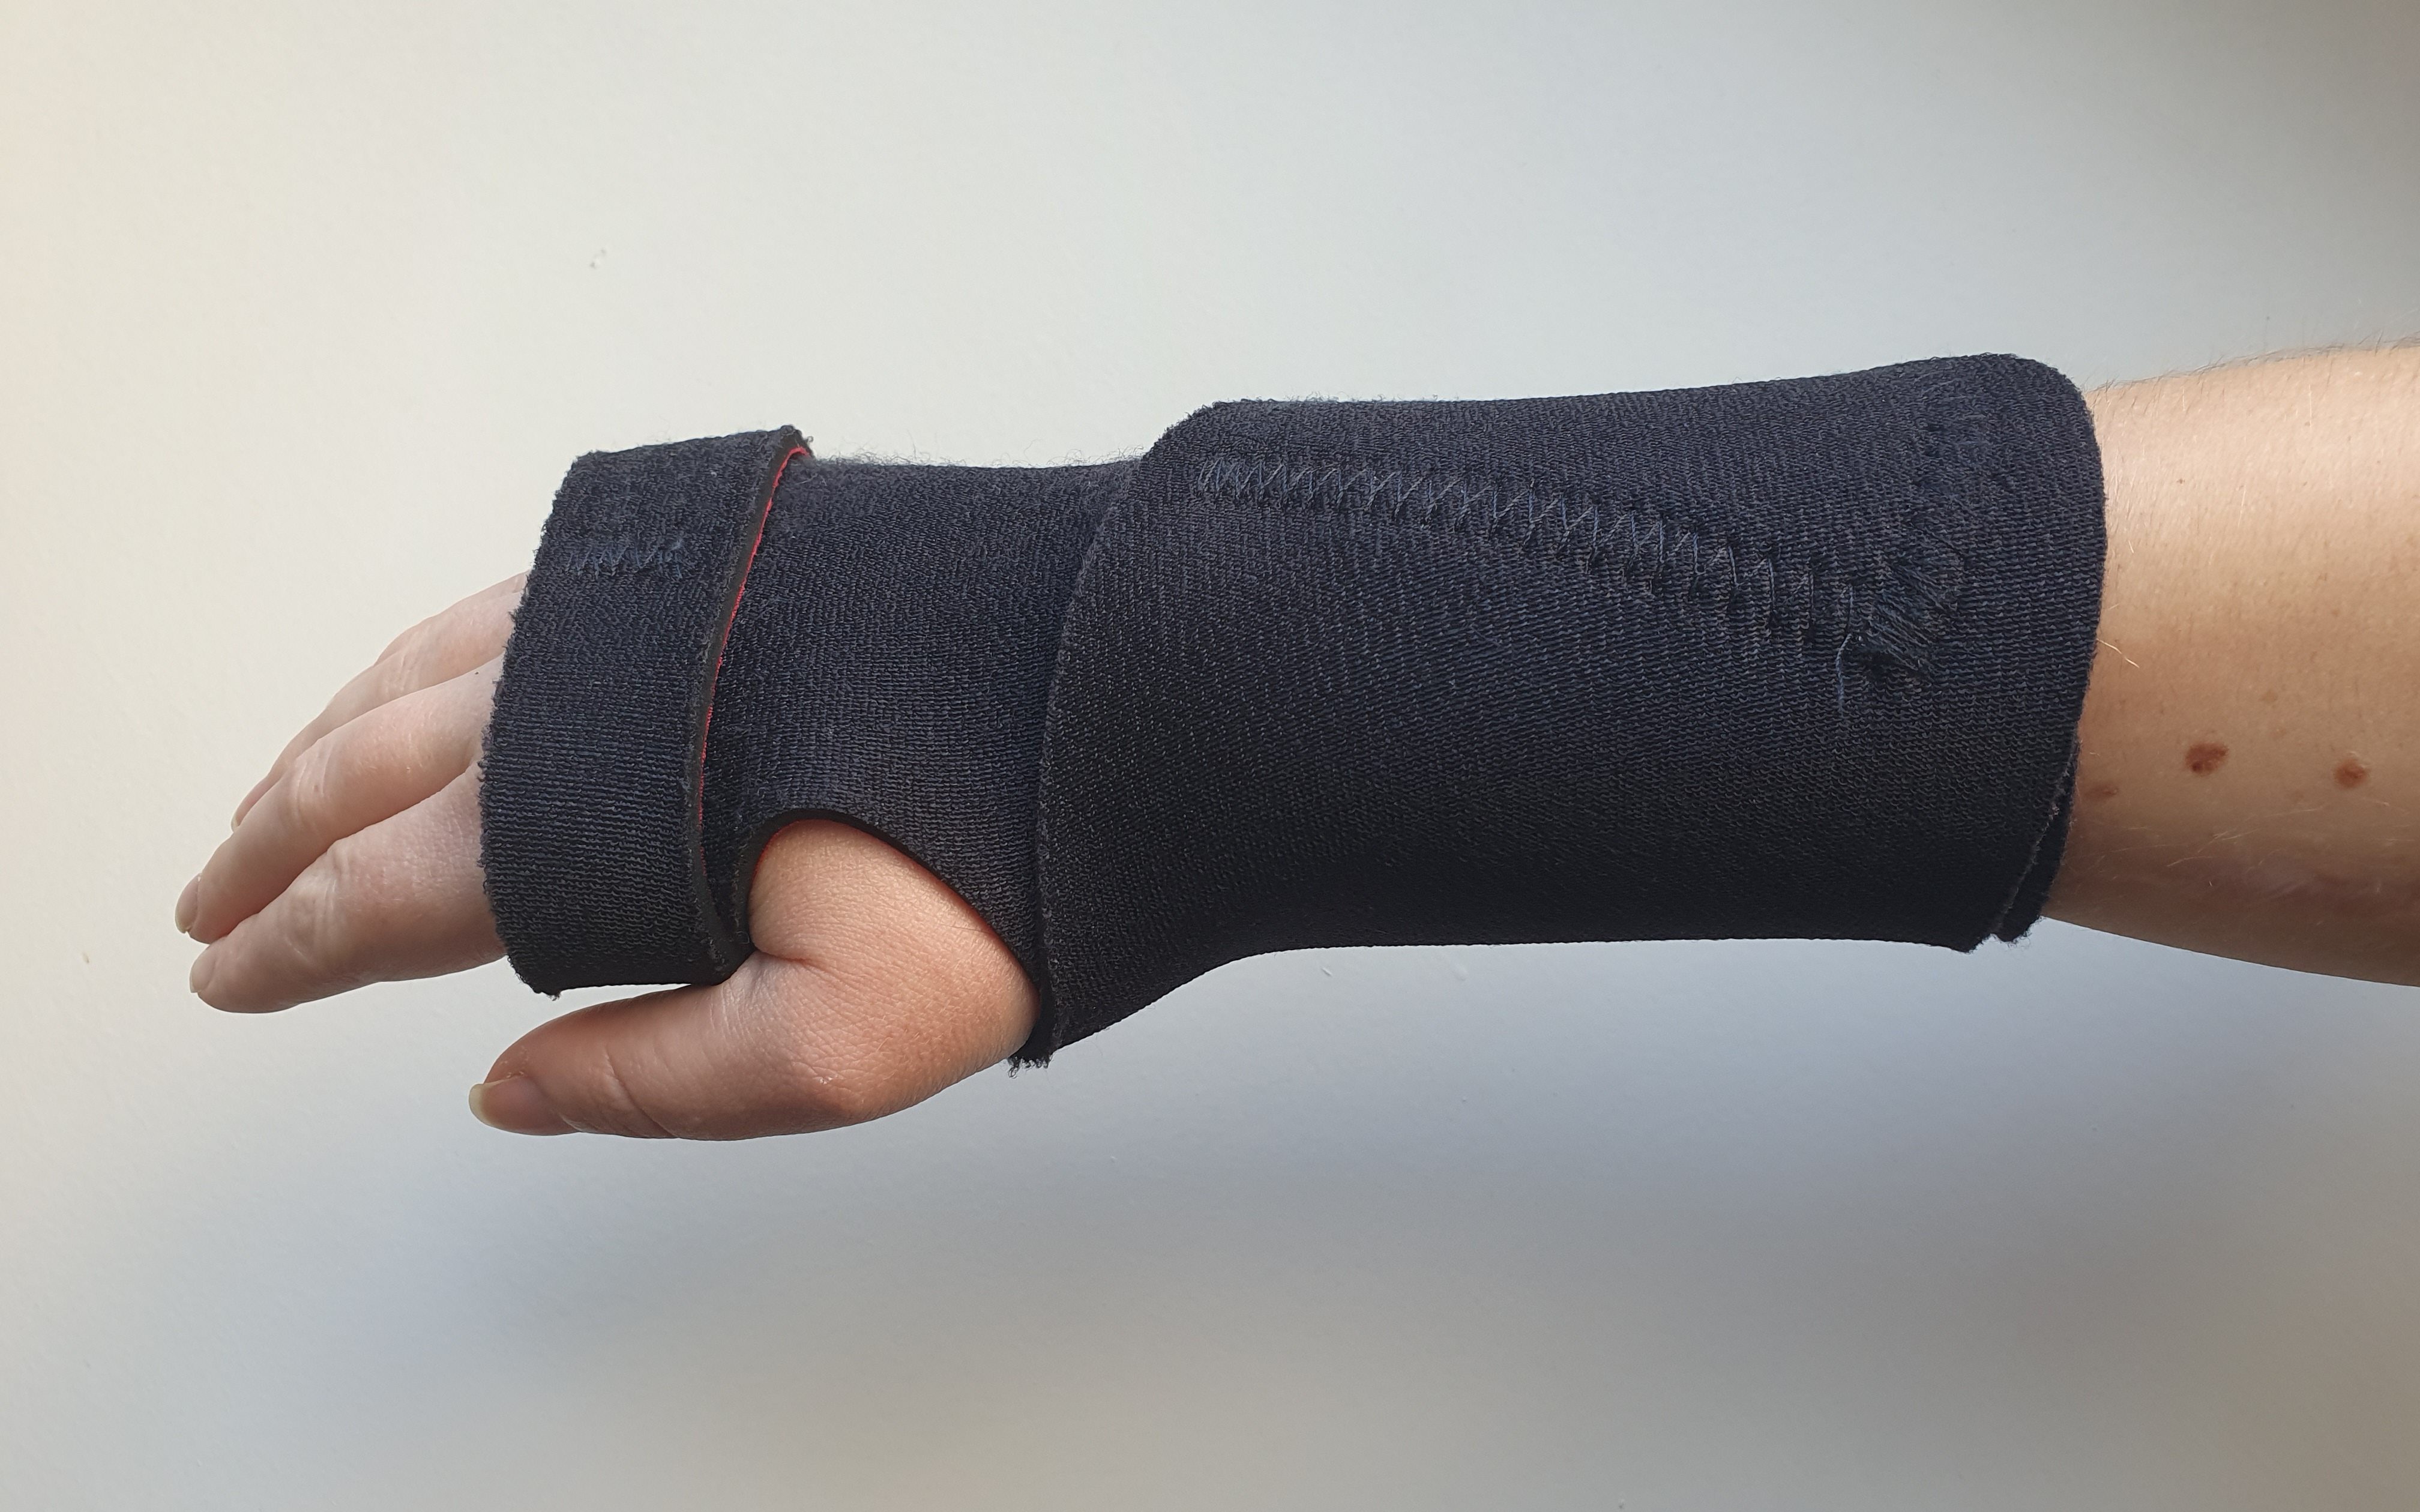
Using a neoprene splint with a metal insert will restrict wrist movement the most, giving the most support. A metal insert will lock the wrist so that the back of the hand is slightly drawn backwards towards the wrist. Although possible to swim in this position, if you don’t require so much support, using a wrist wrap or splint without a metal insert will allow the wrist to move into a more streamlined swimming position. Click here for my reviews of different types of wrist splints. You could also combine a splint with support tape underneath.

Chlorine will damage the elasticity of the neoprene splint over time so it is important to rinse well after every use.

Forearm Fulcrums and Bolster Paddles (High Support)

Forearm fulcrums and bolster paddles are swimming aids designed to lock the hand and wrist in the optimum position for swimming (early vertical forearm position, or EVF). As well as supporting your wrist, they will improve your technique! All main strokes (breaststroke, frontcrawl/freestyle, backstroke, and butterfly) are possible using these swim aids. Because they alter your swimming style, it is recommended to try them out over short distances at first.

I use the FINIS Forearm Fulcrums which pass over the back of the forearm, under the wrist, and across the back of the hand in a figure 8 loop to lock the wrist in position. Rubber at the inside of the wrist and back of hand and arm prevents the Forearm Fulcrum from slipping. Because there is no fabric involved, they are very easy to care for. They come in two sizes: Junior for teens and petite adults, and Senior. I tried both sizes and although both worked for me, the Junior size was a better fit and didn’t require so much tension to hold the fulcrum in place when swimming.

I have palmar mid-carpal wrist instability and can happily swim using these without any subluxations or dislocations as my wrist is unable to move up or down when they are in place. I also have a partially-trapped median nerve, and preventing my hand from moving also helps to reduce nerve irritation and pain. The FINIS forearm fulcrums enabled me from not being able to use my right arm at all, to swimming 500m using both arms the first time I used them.

The FINIS Bolster Paddles are designed with the same goal of stabilising the wrist in the EVF position with a solid hand paddle to increase water resistance. The plastic paddle is secured around the forearm with two velcro straps, and the fingers are held in place by a rubber strap. I haven’t had the chance to try them yet so please leave a comment if you have/haven’t found them useful.

colourful fitness equipment, stretch bands and weights
Hobbies and Sport, Sport and Fitness

Sport and Fitness- Feel Confident Trying Something New

Fitness classes and sports clubs are great for getting into a routine, motivation, providing instruction, and socialising. After I became unable to swim and cycle easily I went on a bit of a quest to find something fun that would keep me fit. I tried lots of different classes and sports including salsa, Zumba, yoga, squash (really not good for weak wrists), pilates, jogging and going to the gym. Trying new things with a disability or injury can be a bit daunting, so whether you are thinking of going to an in person class, or following one online, here are my tips for getting started:

1. If you have a disability, injury or illness and the exercise is something new to you, remember to speak to your doctor about it first. If you join a gym or sign up for classes they will ask you to fill out some medical forms so being informed is key.
2. I really recommend turning up early to speak to the instructor before in person sessions. Rather than just naming your condition, let the instructor know specifically if there’s any movements you can’t do, if you don’t want to be pushed hard, or if you might have to take a break during the session. This might also help if you’re feeling self-conscious about not fitting in exactly with what everyone else is doing.
3. If you’re feeling anxious about getting started, see if you can persuade someone to come with you for moral support, even if it’s just for the first session.
4. Before committing to a long-term gym or classes subscription, look for offers or ask if you can try the first session for free. That way if you’re not enjoying it, you’re free to try something else.
5. Think outside the box if traditional classes aren’t your style. Think swing dance, hillwalking, archery or canoeing!
6. If you can afford it, a one-to-one session can help you to work out the best way to modify exercises for you. This might be to find alternative exercises which accommodate your disability, working on improving skills, or finding out how to play to your strengths. You might also get more personalised suggestions for improvement in a smaller group.
7. Online classes and videos are great for fitting around any schedule and trying things out on your own. Follow the links on the Resources page for free classes, including specialised classes for managing arthritis pain, and post-stroke exercises.
8. Don’t forget any splints, braces or tape that you use to support joints and muscles.
9. Make sure to warm up/cool down, rehydrate and stretch properly before and after the class. For me, this means paying special attention to my wrists.
10. Finally, don’t worry about what anyone else is doing! Take breaks as you need, listen to your body and don’t be afraid to call it a day if it’s really not for you.

“Pre-lockdown I used to enjoy going to Zumba because it’s great cardio and everyone leaves smiling. I would go at the back so I wouldn’t feel self-conscious or worry that I was confusing anyone when freestyling over the moves I couldn’t do. Now I follow online and it’s still a way to improve my agility and coordination in a way that’s more fun for me than going to the gym.”

banner of a watercolour tiger painting, an oil painting of tomatoes, and an abstract yellow and blues acrylic painting
Hobbies and Sport

Quick and Easy Art Media Review

I used to enjoy drawing and painting before my injury and have tried since, but found it too painful for my injured hand and too difficult with my non-dominant hand. I wanted to find something creative that would be fun and easy to do, without needing very fine motor skills.

I dug out a bunch of art supplies from my Art GCSE days and tried them out to see which techniques lend themselves best to non-dominant hand use. I decided to avoid using my dominant hand altogether which left me with my uninjured left hand that’s bad at aiming and still not used to holding a pencil.

Chalk Pastels

Pastels seemed like a good idea because there’s no equipment needed and no washing up. They’re also chunkier than pencils or paintbrushes. They needed more pressure than I had thought and I found them difficult to manipulate. It was also hard to aim because of the pastel’s blunt style combined with my lack of precision. The difficulty caused my right hand to tense up and move around in sympathy, so had the unintended effect of causing pain anyway. I was happy with my picture but I found the style frustrating and painful so I won’t be trying them again soon.

Solid Watercolours

These paints need water to be picked up and mixed in with the brush, which is difficult if you have problems stabilising your arm. A solution to this could be to add in water with an eyedropper, or to use tube watercolours. The paintbrush was thin and difficult to hold, so wrapping tape around it or using rubber pencil grips might have helped. Watercolours were good because very little pressure is needed, but adding details was hard and needed concentration to aim. It’s also not a very forgiving type of paint- if you make a mistake, it’s tricky to cover up. I think I’ll try again with watercolours, but using a different technique and style.

Oil paints

These paints are thick, squishy, and slow to dry so allow lots of corrections and alterations as you go; I used a palette knife to spread and mix the paints together on the page. I found this easier than using a brush because I didn’t have to be as accurate and the movement didn’t need as much dexterity. The only problem with oil paints is that they are tricky to clean up if you don’t have the water-soluble kind.

Acrylic Paints

Acrylic paints are faster to dry than oils but still thick. I premixed some different colours, dotted them randomly on a canvas board, then spread them with a palette knife for an abstract effect. This was quick, fun, and easy to do. It is also easy on the hand and wrist joints and didn’t need much pressure.

Final Thoughts

  • I found the thick paints to be easier to use than watercolours or pastels which needed greater accuracy. I liked the tactile (but low pressure) approach.
  • An easel would have been useful to stop the paper or canvas moving around on the table and I’ll look into that in future.
  • Working on a bigger scale would make adding details easier. I was working on A6 size paper for all except the acrylics (A5).

Hobbies and Sport, Lifestyle, Work and Study

Welcome to ‘I’m Handling It’

‘I’m Handling It’ is a project documenting hand and wrist adaptations that hopes to be a source of ideas and resources for others.

Hi, I’m Hope! I’m a part-time research postgrad student living in the UK and writing my thesis from home. I have wrist instability and chronic pain caused by nerve damage from a road accident, both on my dominant side. After surgeries and physical rehab I’m now investing time into adapting all aspects of life to get my independence and old hobbies back. This usually involves trying to adapt things for one-handed use.

What will be on the blog?

I’ve especially missed playing instruments, baking, doing art, and crafting so will be looking for ways to make these things more one-handed friendly. Around the house I’ll be looking for adaptations and hacks to make cleaning easier, and for recipes and food preparation techniques that are easy to do one-handed. The successes, failures and recommendations will be published here in the hope that it can help others looking for advice.

I also want to share what I’ve learnt from being a disabled student at university and the adaptations that have been helpful so far. I am a Biochemist/Immunologist who used to work in a lab, but for the past year my work has been computational so I have made lots of changes to my computer set up and the technology I use.

I especially want to learn from other people experiencing upper limb disabilities and hope to feature interviews to talk about their experiences and advice. It would be great to highlight adaptation and disability services that already exist for all kinds of upper limb disabilities and injuries, and to bring them together in one place. If you have any suggestions for things you’d like to see, or to propose a submission or collaboration, please do get in touch here.